Subjects:
by category
Ailments
* diagnosis
* diseases
* quarantine
* water
Care
* Basic
* Advanced
* Fishbowls
* water
change
Facilities
* bi-laws
* chapters
* mail
us
GoldfishSanc
Goldfish Sanctuary
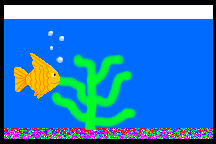
Setting up the Goldfish Aquarium
When we choose to keep goldfish, we do so for a variety of reasons: for companionship, as pets for our children, to embark on an interesting past-time, or because we love animals. Whatever our reasons, one thing is common: we want our aquarium to be a happy and healthy one. No joy is derived from sick fish, and no pleasure is obtained from watching our small charges suffer. They are our responsibility. They have no control over their environments, but we do. By starting right and taking care to set up our aquarium in a way that will benefit our fish, we greatly enhance the enjoyment of our hobby, and the quality of the goldfish's life.
Step One: The Vision
The first thing you will do is consider your choice: a goldfish aquarium. Do a little daydreaming and meditation on this idea. Let your imagination swim. Do you want a big tank, or a little one? Do you want lots of fish, or just a few? What kind of goldfish do you want? Will you have plants? What will your tank look like? Where in your home will it go? Why do you want the tank? Envisioning the possibilities is one of the most enjoyable parts of the set-up process. Don't rush past it... enjoy it. Knowing exactly what you want builds a solid foundation in your mind, and helps you anticipate future challenges. What you can imagine, you can achieve.
Step Two: Research
When we have an idea what we want to create, it is time for research. Research is important, because it is at this stage that we begin to discover what is really involved in keeping goldfish. Pull out the phone book and make a list of all the fish stores in your area. If you have a friend who keeps an aquarium, ask for advice about the best. When you have a list, and you have obtained directions, go to the stores. Notice how much is available. If you are a beginner, the selection is sure to astound you. Goldfish keeping is a science as well as an art, and there is always more to learn! Begin learning now. Explore. Look at different tank sizes, filters, air pumps, foods, and of course, fish. Ask for help with any of your questions. If the staff is too busy to help you, or acts as if your question is an intrusion, then this is probably not a good store to give your business to. Assuredly, during the time you keep fish, you will have many questions. You want to associate with a dealer you can rely on for honest, compassionate, and helpful information.
Visit as many stores as you like. Look for stores that care about their fish. If they do not care about their fish, they will not care about your fish, and you should avoid them. If there are many dead or diseased fish in their tanks, move on. If they are hostile to their customers or show no concern when handling fish, move on. An added benefit of visiting many stores is discovering who has the best selections and prices.
Research can take other forms as well. Reading fish magazines and books is an excellent idea. They are available at local bookstores and libraries. Read as much as you can, and stay in touch with your local petstore as questions come up. There are also resources on the World Wide Web (such as this one). If you have friends who keep fish, talk to them regularly for advice. Learn everything you can about what is involved in keeping fish.
Learning all about how goldfish live can be a very pleasurable experience, especially if you are truly interested in them. You may be enthusiastic about getting started, but think of research as a way of getting to know your new pet before you bring him to your home. The fish will wait.
note - If you have decided on a specific fish, and you are certain you want it, a good fishstore will hold the fish for you or allow you to buy it in advance. The fish will live quite happily in the fishstore until you are actually ready.
Step Three: Planning
By this time, you will have a very good idea of how goldfish live, how they are cared for on a daily basis, and what their special needs are. You may have adjusted your original vision by now, and that is natural. You may have to adjust it many times to be certain that it is a realistic and healthy environment for your fish.
With your research complete, you can begin planning your aquarium in more detail. What will you actually do? It's time to make concrete decisions. What size tank will you buy? What kind of filter do you want? Will you need a heater? What kind of goldfish are you buying, and what do you need to obtain in order to meet his needs? Will your tank sit on furniture, or on a specially-made tank stand? How much gravel will you need? Reviewing the Basic Care of goldfish should help you make these decisions. Additional information follows. Make a list of everything you will need. A sample list follows:
55-gallon tank, hood with florescent lighting, tank stand, 2 Whisper-3 Power Filters, large airstone, 6 feet of airline tubing, large airpump, powerstrip, gravel, fish food, filter-replacements, dechlorinator, thermometer, cork, blankets to cushion tank in car, plastic plants, 1-way air valve, 10-gallon tank for water-changes, 2 buckets for water-changes, gravel siphon
Take your list to the store and find out how much it will cost. You have visited the fish stores already, and you may be developing some favorites. Even though you have not purchased anything yet, they will begin to recognize you, and will help you with your planning.
Adjust your plan as needed, but at all times keep in mind the best interests of your fish. For example, if you can only afford a fishbowl, don't decide to keep your fish in a bowl - instead, plan for ways that you could obtain a tank, or make plans for using some other container. If you are unable to obtain suitable accomodations for the fish you want to keep, then do not purchase the fish. Every fish deserves a healthy, happy life.
Step Four: Obtaining Supplies
After you have decided exactly what you need, it is time to begin obtaining it. This can take place all at once or a little at a time. Inspect all equipment for cracks or imperfections before buying it, and save your receipts. Do not buy your fish yet, however. The aquarium must be completely set up before you add any fish at all.
Step Five: Situating the Tank
You have already decided where your tank will go. You have selected a tank of good quality that is big enough for the number of fish you wish to keep. There are several things to keep in mind when situating your tank, all of which are best planned ahead of time:
Light - You want to select a location that gets indirect sunlight, but direct sunlight generally should be avoided. It can promote excessive growth of algae or even overheat your tank.
Drafts - Fish are sensitive to drafts, and you want to place the tank where drafts don't exist. A site in line with a door or too close to a window also subjects your aquarium to cold air. You want an area of the room where the temperature is as stable as possible.
Power - The tank needs to be near an outlet for easy access to electricity. The outlet itself will need to be easy to reach after the tank is set up.
Equipment - Give some consideration to where you will place pumps, filters, supplies, etc. in relation to the tank.
Suitable Support - A small tank can be set up on a piece of very sturdy furniture. Lightweight furniture will undoubtably give way or otherwise put stress on the tank. A ten-gallon tank will weigh about 100 pounds when filled with water and gravel. Bigger tanks weigh even more. A large or small tank can be set on a specially-made stand or on the floor. Even bigger tanks must be positioned across the joists in your floor so the weight is distributed across as many joists as possible. This helps prevent the floor from sagging, or even breaking under the extreme pressure of a large aquarium. A 100-gallon tank weighs close to 1/2 a ton! A very big tank can also be placed in a basement where the concrete floor can provide it with the best possible support. Whatever the support chosen, it should be in place before you bring in your tank.
Cushioning - The tank should be completely even when full. Irregularities can be absorbed by placing a sheet of cork beneath the tank. A sheet of thick wood or metal plate can also be placed beneath the stand or furniture to protect the carpet and floor.
Space - Make sure you will be able to easily reach into the tank to position rocks or do water changes. Your tank should be accessible. Have an area near the tank for storing any supplies.
Traffic - Ideally, the tank will be located in an area of low or moderate traffic. If the tank is too close to a corner or doorway, there is the chance that someone may bump into it. Running feet or slamming doors cause vibrations in the tank which are stressful to fish. A tank is best placed "a little out of the way."
Water - You will need to bring water to and from the tank on a regular basis. Try to place the tank a reasonable distance from the water source.
Bring a friend if your tank is a big one. Even an empty tank is very heavy. You will need help putting it into the vehicle for transport, and you will need help maneuvering it around corners, up stairs, through doorways, etc. A strong friend is an even better idea!
* * * * * * * * * *
Wash your tank with a hose or by hand to remove any grime or particles. Dry your tank using paper towels (to avoid the possibility of placing soap residue in your aquarium). Inspect your tank for imperfections one more time.
Place your tank at its final position. Make sure there is enough space to attach all your equipment (- ie filter box). Use a sheet of cork under your tank to absorb irregularities. To see if the tank is level, fill it with a small amount of water, and measure the height of the water at each corner. When you are satisfied that your tank is level, you have successfully situated your tank.
Step Six: Adding the Gravel
If you are adding an undergravel filter, you will want to install this equipment before continuing. If you choose to do this, you will want to wash it with tap water, then place it into the tank. The back of the undergravel filter plate should rest close to the back wall of the aquarium, and the plate should be centrally located. The plate should be as large as possible for the best results. The riser tubes on either end will have been fitted with airstones and airline tubing which will later be connected to air pumps or power heads as per your design. You can use aquarium sealant to permanantly fix the plate to the bottom of the tank if you wish. A biological filter is most effective when it is used in conjunction with another type of filter.
It is time to prepare the gravel. A gravel which contains no dye is preferable to and generally safer than colored gravel. The best gravel size is about 1/8 of an inch (3 mm) and rounded. Before you add it, you must wash it. It is best to wash gravel in small amonts. The time needed to do this is a long-term investment in the health of your goldfish. One good method involves filling a new bucket half way with gravel, and then letting water run into it as you stir vigorously with your hands. All of the sediment will be agitated out and washed away. When there is no more sediment and the water runs clean from the bucket, you have finished washing that batch of gravel, and you may place it in the tank. If you can see tiny particles or off-colored water when you stir the gravel, you have not yet finished that batch. If you do not remove them now, those tiny particles will remain in your fish tank. Even a siphon will not remove them.
Finally, it is time to place the gravel in your tank. If you have an undergravel filter, place a few handfulls of gravel on it to stabalize it. The depth of gravel is up to you, but 3 to 4 inches deep is suggested. This is best for plants and offers you a good depth should you want to bury equipment or air hoses. Some fishkeepers like to slope the gravel so that it is higher in the back than in the front. This is visually attractive and encourages debris to roll toward the front of the tank, aiding in cleaning.
Don't allow gravel to slip underneath the undergravel filter. Make sure that the plate is covered by at least 3 or 4 inches of gravel to prevent the fish from digging it out.
When you are finished, rinse the cleaning bucket well.
Step Seven: Preliminary Fill
You may place any rocks or heavy scenery into the gravel at this time. Slate, red shale, and other nonporous rocks are acceptable. Porous materials should be avoided. It is also best to purchase these from a dealer rather than collect them from nature. This cuts down on the possibility of pollution.
If you have doubts about stability as you arrange and stack the rocks, you can use aquarium sealant to fix rocks to each other. An accidental cave-in could be dangerous for your fish! When the heaviest scenery and equipment have been buried in the gravel, we are ready for the preliminary fill.
Leave the faucet running for a moment to reduce the heavy metal content of the water, then fill your bucket with cool water. It is time to bring water to your tank. You will want to fill it about 1/2 way. Do this carefully to avoid disrupting the gravel or just readjust the gravel after pouring. As you do this, you may wish to add plastic plants by securing their "roots" into the gravel. Check your work. Make sure that the hiding places are accessible and yet still allow plenty of room for swimming. Comets and Shubunkins especially appreciate as much swimming room as you can provide.
Bury airstones and hoses into the gravel at this time. They are best placed at the back of the tank, and can be concealed by scenery if you wish. If you are not pleased with the results, simply rearrange before filling your tank to the top.
Step Eight: Final Fill
Fill your tank to the top now. It is best to fill the very top. This gives your fish the best swimming room, and as the waterline vanishes behind the plastic rim, your tank will have that completed appearance. If there is dust or debris at the water's surface, you can skim it off with a paper towel.
If you have an undergravel filter, adjust the lift tubes so the tops are half in and half out of the water, positioned to push water toward the center of the tank.
Step Nine: Add Final Equipment
Your external box filters are best placed at the back of your tank. They should be evenly spaced for best results with the intake tubes ideally 6 inches above the gravel. Also, pour some water into each filter chamber.
Attach any air pumps to their respective airline tubing and place them in a secure final location. If you are fitting a heater, put that in place. If you need to break away sections of your hood, do so and then place it on your tank in its final position. Make sure air hoses are not clamped beneath the weight of the hood.
Before you plug anything in, it is very wise to make sure all cords and external equipment is dry. In addition, you will want to form a drip loop. If water runs along the cord during a fish's splashing, you don't want the water to run down to the outlet. Therefore, part of each cord should be fixed with some kind of weight about a foot and a half away from the plug. This weight will hang below the outlet and near to the floor. If water runs along the cord, it will drip to the ground rather than to the outlet. Another effective method involves mounting a powerstrip above the tank (this can be done with two nails and a hammer). This likewise prevents water from running into the outlet.
Once you have taken all safety precautions and read over all the equipment instructions, you may turn on the power. If you need to make any adjustments, make sure everything is unplugged before you do!
DO NOT work on a tank when it is plugged in. The resulting shock could be fatal to you.
Step Ten: Final Preparations
With the exception of the lights, it is a good idea to let your equipment run for two weeks before moving on. If there is faulty equipment, or a hidden leak in your tank, this will allow you to know immediately. Over these two weeks, you will be able to make any additional adjustments.
One thing you may wish to do is seed your tank. By adding a little gravel from an established (in operation for 6 months) tank, you will be able to accelerate the growth of good bacteria in your tank. Good bacteria WILL eventually grow in your tank, but this speeds the process. When your tank develops a large colony of good bacteria, it will be of help in keeping your aquarium healthy.
In any case, two weeks is the minimum time required for these health-giving bacteria to appear and for your tank to mature. Additionally, your water will naturally release any chlorine during this time, again making your tank healthier. Your water will also move to room temperature. It is so important to give your tank this time to settle before adding any fish. By giving a minimum of two weeks for your tank to settle, you will greatly reduce stress to your fish when you finally bring them home. It is best for you, it is best for them. Use these two weeks to buy any last-minute equipment, food, or make adjustments that you did not consider before. It is so much better to do these things before your fish arrive so that you will not disturb them later. If you need more than two weeks for your final preparations, then take your time! When your goldfish finally come, you will know that their new home is absolutely 100% ready for them.
Step Eleven: The Day the Goldfish Come Home
At last, your tank is fully prepared. You will have selected fish that are right for your tank. You will have selected healthy fish for your petstore. The fish you have selected are compatible with each other. It is time to bring them home.
NOTE: If you are adding fish to a tank which already has goldfish in it, it is important to put new fish through a quarantine period.
If it is going to be a cold trip home, you will want to bring your fish home in an insulated fish box or picnic cooler. Even a shoebox with some warm fabric inside may serve as a temporary "warm box."
The shock from being moved from a dark area (the petstore) to a light area (the outdoors) is very stressful for goldfish. When you receive the plastic bag from the dealer with your fish in it, be sure it is wrapped in newspaper or placed in a brown paper bag (double-wrap or pack if possible!) You should be prepared in case your dealer is not! Bring some paper bags along!
Treat your fish with gentleness and kindness as you move them to your car. They will feel every jolt, and be stressed by it, so minimize the stress as much as possible by walking and driving smoothly.
When at last they are home, bring them to the aquarium and dim the lights. When the room is dim, carefully unwrap each package and see how they are. To acclimate the fish, float the plastic bags in the new tank for 15 minutes. Then, over the next few minutes, add a little more water to the bag from the new tank. When this process is complete, open the bag and let the fish swim into the tank.
It has been a long trip. Leave them alone or watch quietly from afar. Leave lights and aquarium lights off for a few hours. You have welcomed your fish home. As you watch them swim and explore, pledge to yourself that you will always look after their well-being and that you will learn all you can about them. It is an important responsibility you have undertaken, the care of new lives. Be proud, for you are a keeper of goldfish.
Note: 6 months after setup is suggested before adding plants.